Quick Answer: How is a countertop installed, step by step?
- Five core stages: Countertop installation runs through five stages: site preparation and safety, template creation and precise measuring, cutting and shaping, securing the slab with adhesive (plus brackets for heavy stone), and finishing with sealing, backsplash, fixtures, and a final inspection.
- Plan first: Before fitting, choose the material (granite, quartz, marble, laminate, or solid surface), measure length, width, and depth while accounting for backsplashes, sinks, and appliances, level and reinforce the cabinets, and plan plumbing and a realistic fabrication-plus-install timeline.
- Material trade-offs: Granite gives a natural, high-end look but needs regular sealing; quartz is prized for durability and low maintenance; natural stone requires a sealant to resist stains, repeated periodically for maintenance.
- Cutting stone safely: Cut granite or quartz with specialized cutting tools and water application to prevent cracking, smooth edges with sanding blocks or sandpaper, and always wear gloves, safety glasses, and a dust mask.
- DIY or pro: DIY saves on labor and works for straightforward materials like laminate, but for complex jobs and heavy or expensive materials like granite or marble, hire a professional for expertise, speed, the right tools, and a workmanship warranty.
Countertops are more than just practical surfaces in your kitchen or bathroom; they are essential elements that contribute significantly to the room’s aesthetics and functionality. The process of countertop installation is an intricate art that requires a blend of precision, skill, and an eye for design. This article aims to demystify the nuances of countertop fitting, guiding you through each step from the initial measurements to the finishing touches.
The journey of installing a countertop begins long before the actual fitting. It starts with an understanding of why a well-installed countertop is crucial. A properly fitted countertop not only enhances the visual appeal of your space but also ensures longevity and ease of use. It’s a surface where daily life unfolds, from preparing meals to sharing conversations, so its importance cannot be overstated.
The installation process involves several key stages, each requiring careful attention and expertise. These include choosing the right material, measuring the space accurately, preparing the installation area, and the actual fitting and finishing of the countertop. Whether you are considering a DIY project or hiring professionals, understanding these steps can help you make informed decisions and appreciate the craftsmanship involved.
In the following sections, we will delve into the details of each step, offering insights and tips to help you navigate the process. From the selection of materials to the final inspection of the installed countertop, our guide aims to equip you with the knowledge needed to ensure a successful and satisfying installation experience.
Planning and Preparation
The success of countertop installation hinges significantly on thorough planning and meticulous preparation. This phase lays the groundwork for a smooth installation process and ensures the longevity and functionality of your countertop. Let’s break down this crucial stage into its key components.
- Choosing the Right Countertop Material: The first and perhaps most exciting step is selecting the right material for your countertop. The market offers a wide range of options, including granite, quartz, marble, laminate, and solid surface materials. Each comes with its unique properties, aesthetics, durability, and cost. For instance, granite offers a natural, high-end look but requires regular sealing, while quartz is known for its durability and low maintenance. Your choice should align with your lifestyle, budget, and the overall design of your space.
- Measuring Your Space Accurately: Precision is paramount when it comes to measuring the space for your new countertop. Inaccurate measurements can lead to significant issues during installation, such as poor fit or inadequate material. It involves measuring the length, width, and depth of the installation area. Remember to account for backsplashes, sinks, and appliances. It’s often recommended to have a professional take these measurements to ensure accuracy.
- Preparing the Installation Area: Pre-installation preparation involves several steps to ensure that the area is ready for the new countertop. This includes removing the old countertop, if present, and ensuring the cabinets or base on which the countertop will rest are level and strong enough to support the weight of the new countertop. This is also the time to address any modifications or repairs to the underlying structures. For instance, reinforcing cabinetry for heavy materials like granite is often necessary.
- Planning for Plumbing and Appliances: If your countertop will accommodate a sink, faucet, or appliances, it’s crucial to plan for these fixtures in advance. This includes ensuring the compatibility of the sink with the countertop material and the alignment of plumbing connections. For appliances like cooktops or built-in ovens, ensure that the measurements are precise, and there’s adequate clearance for installation and ventilation.
- Scheduling and Timeline: Establishing a realistic timeline for the installation process is important. This includes not only the actual installation time but also the time required for the fabrication of the countertop, especially if it’s a custom design. Coordination with other ongoing projects, such as cabinetry installation or a full kitchen remodel, should also be considered to avoid conflicts and ensure a seamless process.
Addressing each aspect in the planning and preparation stage ensures successful countertop installation. This foresight not only minimizes potential challenges during the installation but also ensures that your new countertop will be a beautiful and functional addition to your space for years to come.
Tools and Materials Needed
Having the right tools and materials is crucial for a successful countertop installation. This stage requires a combination of general tools and specific materials that are essential for handling, cutting, and securing the countertop. Let’s explore the essential toolkit and materials needed for this task.
- Essential Tools for Countertop Installation:
- Measuring Tape and Level: Precision is key in countertop installation, making these tools indispensable for ensuring accurate measurements and level surfaces.
- Circular Saw or Jigsaw: These are needed for cutting the countertop material to size, especially if it’s a laminate or wood surface. For stone countertops, specialized cutting tools may be required.
- Drill and Drill Bits: A drill is necessary for making holes for sinks, faucets, or other fixtures. Ensure you have the correct drill bits for your countertop material.
- Adhesive and Caulking Gun: A high-quality adhesive is used to secure the countertop to the base cabinets. A caulking gun will be needed for applying sealants.
- Sanding Blocks or Sandpaper: These are used for smoothing the edges of the countertop after cutting.
- Safety Gear: Safety glasses, gloves, and ear protection are essential to protect yourself from dust and debris during cutting and installation.
- Selecting Quality Materials:
- The Countertop Material: This is your primary material, chosen based on your preference, budget, and the style of your space. Options include granite, quartz, marble, laminate, and more.
- Sealants and Finishes: Depending on the type of material you choose, you may need sealants (for natural stone) or finishes to protect the surface and enhance its appearance.
- Underlayment or Plywood: This is often used as a base for certain types of countertops to provide additional stability and support.
- Backsplash Material: If you plan to install a backsplash, the material should complement or match your countertop.
- Sink and Faucets: If your countertop will house a sink, ensure you have the right size and style that fits both the countertop and the overall design of the space.
- Miscellaneous Supplies:
- Shims: These are used for leveling countertops on uneven surfaces.
- Silicone Sealant: For creating a waterproof seal between the countertop and the wall, especially around sinks and backsplashes.
- Cleaning Supplies: Post-installation cleanup is vital, so have cleaning supplies like rags and cleaners suitable for your countertop material.
Gathering all these tools and materials before starting your installation project will help streamline the process and reduce the likelihood of interruptions. Remember, the right tools not only make the job easier but also ensure a more professional and lasting installation.
The Installation Process
The installation process of a countertop is a detailed and meticulous task that requires patience, precision, and the right technique. Following a structured approach ensures a smooth installation and an aesthetically pleasing result. Let’s go through the key steps of the installation process:
Step 1: Site Preparation and Safety Measures
- Clearing the Area: Begin by clearing the workspace and ensuring easy access to the area where the countertop will be installed. Remove any existing countertops, appliances, and ensure that the cabinets or base are empty and clean.
- Safety Precautions: Safety cannot be overstressed. Wear protective gear such as gloves, safety glasses, and a dust mask, especially when cutting materials and handling heavy countertops.
Step 2: Template Creation and Precision Measuring
- Creating a Template: A template is crucial for precision. It can be made from cardboard or thin plywood. Trace the exact dimensions of the installation area, including sinks, fixtures, and backsplashes.
- Transferring Measurements: Once the template is ready, transfer these measurements accurately onto the countertop material, ensuring allowances for overhangs and edge finishes.
Step 3: Cutting and Shaping the Countertop
- Cutting the Material: Using the appropriate tools, cut the countertop material following the template guidelines. For materials like granite or quartz, specialized cutting tools and water application are required to prevent cracking.
- Smoothing Edges: After cutting, use sanding blocks or sandpaper to smooth the edges and corners, reducing the risk of chips or cracks.
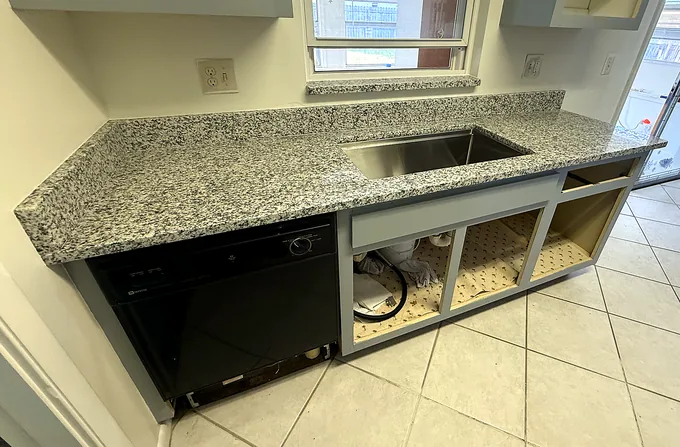
Step 4: Securing the Countertop in Place
- Applying Adhesive: Apply a bead of adhesive on the top edges of the base cabinets. For heavier stone countertops, additional supports or brackets may be required.
- Placement and Alignment: Carefully place the countertop onto the base, ensuring proper alignment. Adjust as necessary before the adhesive sets.
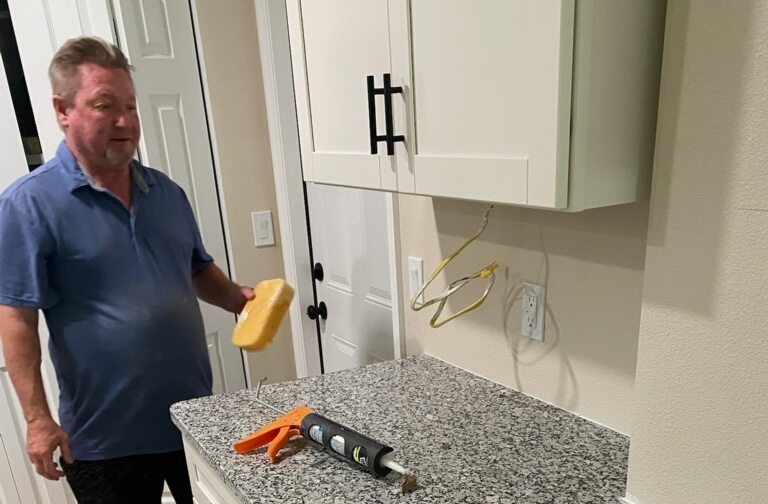
Step 5: Finishing Touches and Sealing
- Sealing the Countertop: If you’re installing a natural stone countertop, apply a sealant to protect it from stains and damage. This step may be repeated periodically for maintenance.
- Installing Backsplashes and Fixtures: Attach any backsplashes using adhesive and seal the edges with silicone sealant. Also, install sinks, faucets, and other fixtures, ensuring a snug and leak-proof fit.
- Final Inspection and Clean-Up: Check the countertop for any alignment issues, gaps, or imperfections. Once satisfied, clean the countertop and surrounding area to remove any debris or dust from the installation process.
Remember, countertop installation can vary depending on the material and the specific conditions of your space. For complex installations, especially with heavy materials like granite or marble, it is best to hire a professional for optimal results. The goal is to achieve not just a visually appealing countertop but also one that is functional and long-lasting.
DIY vs. Professional Installation
When it comes to countertop installation, homeowners often face the decision between undertaking a DIY project or hiring professional installers. Both options have their merits and challenges, and the best choice depends on various factors including skill level, budget, and the complexity of the project. Let’s explore the pros and cons of DIY vs. professional countertop installation.
- DIY Installation
- Pros:
- Cost Savings: One of the most significant benefits of DIY installation is the potential cost savings. By eliminating labor costs, you can often complete the project at a lower total expense.
- Personal Satisfaction: Completing a countertop installation on your own can provide a sense of accomplishment and the opportunity to tailor the project exactly to your preferences.
- Flexibility: DIY allows you to work at your own pace and schedule, making it easier to manage around other commitments.
- Cons:
- Skill Level and Learning Curve: Countertop installation requires a certain level of skill, especially when working with materials like granite or quartz. Mistakes can be costly and time-consuming to rectify.
- Access to Tools and Equipment: Professional installations often require specialized tools that may be expensive or impractical for a one-time DIY project.
- Potential for Mistakes: Without professional experience, the risk of measurement errors, improper installation, or damage to materials increases.
- Professional Installation
- Pros:
- Expertise and Experience: Professionals bring years of experience and expertise, ensuring a high-quality installation that accounts for all technicalities.
- Time and Efficiency: A professional team can complete the installation much faster than an individual, which is particularly important in spaces that are in regular use, like kitchens.
- Access to the Right Tools: Professionals have the necessary tools and equipment to handle various materials and complex installations.
- Warranty and Liability: Many professional services offer warranties on their workmanship, giving you peace of mind and protection against potential future issues.
- Cons:
- Cost: Professional services can be significantly more expensive than a DIY approach, especially for labor-intensive projects.
- Less Personal Control: You have less control over the process and timeline, and finding the right contractor can be time-consuming.
When to DIY and When to Call a Pro:
- DIY: If you have experience with similar home improvement projects, access to the necessary tools, and are working with relatively straightforward materials like laminate, a DIY approach can be a viable option.
- Professional Installation: For complex projects, heavy or expensive materials like granite or marble, or if you lack the time and experience, professional installation is recommended.
Ultimately, the decision between DIY and professional countertop installation depends on your individual circumstances, including your skill level, the complexity of the job, and your budget. While DIY can be rewarding and cost-effective for simpler projects, professional installation offers expertise and efficiency, particularly for more complex installations.
Conclusion
The journey of countertop installation, from planning and preparation to the final touches, is a complex and intricate process that plays a vital role in enhancing the aesthetics and functionality of your space. Whether you choose a DIY approach or opt for professional installation, the key lies in understanding the importance of each step in the process and the attention to detail required.
Countertop installation is not just about fitting a surface into a designated space; it’s about creating a harmonious and functional element that complements the overall design of your room. It requires careful consideration of materials, precise measurements, meticulous preparation, and skilled execution. The choices you make, from the type of material to the installation method, will have a lasting impact on the look and feel of your space.
For those considering a DIY installation, remember that while it can be cost-effective and personally rewarding, it demands a certain level of skill, patience, and access to the right tools. On the other hand, professional installation, though more costly, offers expertise, efficiency, and often a warranty for the work performed.
In conclusion, countertop installation is a significant undertaking that can transform the functionality and aesthetic appeal of your kitchen or bathroom. Whether you take on the project yourself or hire professionals, the goal is to achieve a beautiful, durable, and well-fitted countertop that meets your needs and enhances your daily life. With careful planning, the right tools, and a clear understanding of the process, your countertop installation can be a successful and rewarding endeavor.
EdStone fabricates and installs granite, quartz & marble countertops across Central Florida — including Kissimmee, Lakeland, Winter Haven and Daytona Beach. Get a free in-home estimate or call (407) 973-2074.