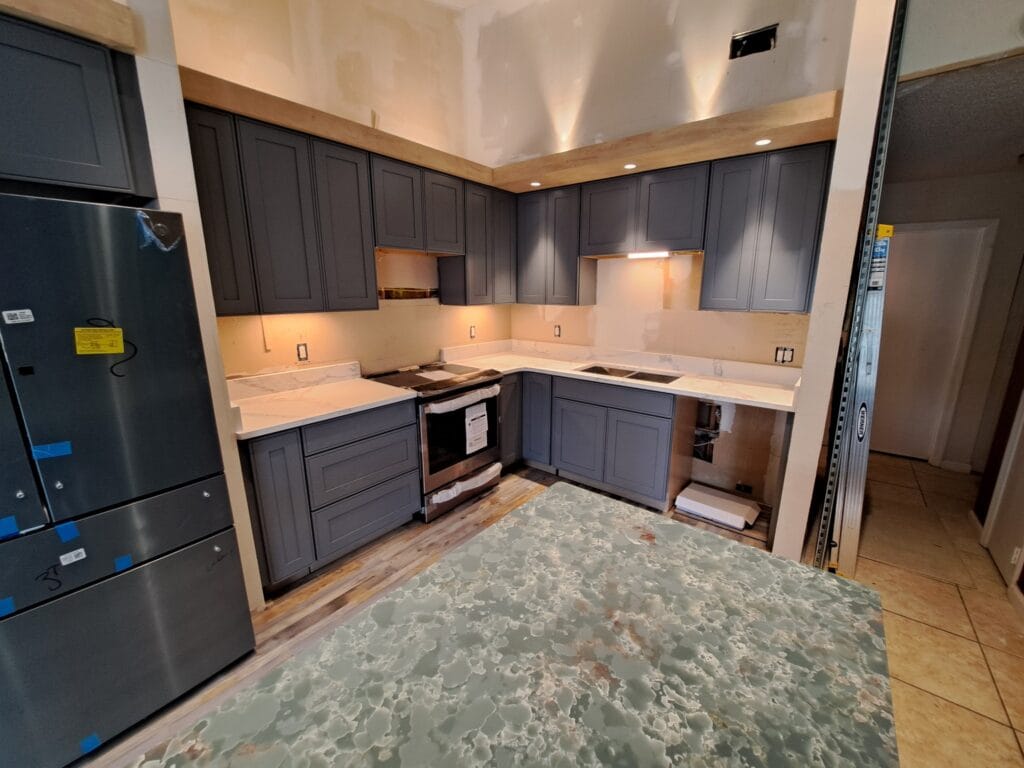
Getting new countertops installed is an exciting home improvement project that can refresh the look of your kitchen or bathroom while adding value to your home. Whether you’re choosing sleek granite, durable quartz, or classic marble, understanding the steps involved in the installation process will help ensure a smooth experience from start to finish. This guide will walk you through each stage of the countertop installation timeline, so you know exactly what to expect and how long it might take. Knowing the details of each step will also help you plan accordingly, minimize disruptions, and enjoy the transformation of your space.
1. Initial Consultation and Planning (1-2 Weeks)
The first stage of a countertop installation project involves meeting with a professional to discuss your needs, preferences, and budget. During the initial consultation, you will have the opportunity to explore different material options, such as granite, quartz, marble, or laminate, each with unique features and price points. This is a great opportunity to compare the pros and cons of each material, considering factors such as durability, maintenance requirements, color options, and cost.
An important aspect of this consultation is measuring the area where the new countertop will be installed. Accurate measurements ensure that the material will fit properly, reducing the chances of any issues during the installation. The professional will likely use precise tools to measure your space, taking into account any irregularities in the walls or cabinets that may impact the fit. Once measurements are taken, you’ll receive a project estimate, including material costs, labor, and any additional expenses, such as demolition or plumbing adjustments.
This stage usually takes about 1 to 2 weeks, as it involves researching materials, coordinating schedules, and obtaining estimates. It’s also an ideal time to think about any additional features you want, such as a backsplash or edge profiles that complement the overall design. If you’re working with a designer, they may also assist you in selecting finishes that will match the rest of your kitchen or bathroom, such as cabinet colors, flooring, and wall paint. Making thoughtful decisions at this stage will help ensure that the final product aligns with your vision.

2. Material Selection and Ordering (1-3 Weeks)
Once you’ve finalized your design, the next step is choosing the right countertop material. The material you choose will not only determine the aesthetics of your space but also impact its functionality and maintenance needs. For example, quartz is highly durable and low-maintenance, while marble offers a luxurious appearance but requires more care. Other options, such as granite, provide a unique, natural look, but may need periodic sealing to maintain their appearance.
After selecting your material, it’s time to place the order. The lead time for materials can vary based on availability and the type of countertop you’ve chosen. Some materials, such as granite slabs, may require additional time for delivery due to the logistics of quarrying and shipping. On average, this phase can take anywhere from 1 to 3 weeks, depending on your supplier and the availability of your chosen material. If you are opting for a more exotic or custom stone, it may take even longer to source and deliver the slab.
During this time, it’s also important to finalize other details, such as selecting the edge profile of your countertop. Edge profiles, such as beveled, bullnose, or ogee, can significantly impact the overall look of the countertop, and they also affect the cost and complexity of the fabrication process. Additionally, if you are planning to install an integrated sink or special features like a waterfall edge, those details need to be finalized and communicated to the fabricator to ensure they are included in the design.
3. Template and Measurement Appointment (1-2 Hours)
Before your countertop can be fabricated, a technician will visit your home to create a detailed template. This is one of the most crucial steps in the entire installation process, as the template serves as the blueprint for your new countertop. During the template appointment, the technician will use specialized tools to measure the dimensions of your cabinets, appliances, and any other components that may affect the fit of the countertop. They may use laser measuring devices or physical templates to ensure the measurements are as accurate as possible.
This appointment typically takes 1 to 2 hours, but the accuracy of the template is key to ensuring the countertop fits perfectly in your space. It’s important to have everything in place before this step, including sinks, faucets, and cooktops, so that all cutouts are correctly accounted for during the fabrication stage. Any changes made after the template is created can result in delays or additional costs, so it’s important to be certain of your choices before this appointment. The technician will also confirm any special requests, such as overhangs for seating areas or specific cutouts for appliances, to ensure all details are captured.
4. Fabrication of the Countertop (1-2 Weeks)
With the measurements completed, the next step is fabrication. During this stage, your chosen slab is cut to size, polished, and prepared according to the template specifications. The fabrication process involves precision cutting and edge profiling, which requires skilled craftsmanship and the use of specialized equipment to ensure the finished product looks and functions as intended. The fabricator will also make cutouts for sinks, cooktops, and other fixtures, ensuring that these openings are properly sized and positioned.
The time needed for fabrication depends on the complexity of the design and the type of material used. On average, fabrication takes about 1 to 2 weeks. More intricate designs, including custom edges or integrated sinks, may require additional time to complete. During this time, the slab is also inspected for quality, and any imperfections are addressed to ensure that the final product meets your expectations. Some fabricators may invite you to inspect the slab before final cutting, giving you a chance to approve the layout and ensure that the veining or patterns align with your preferences.
In addition to cutting and polishing, the fabricator will apply any necessary sealants to protect the countertop from stains and damage. Natural stones like granite and marble often require sealing to maintain their durability and prevent staining, whereas engineered materials like quartz may not need sealing. Proper sealing is critical for ensuring the longevity of your countertop, especially if you have chosen a porous material.

5. Preparing the Installation Site (1-3 Days)
Before the new countertop can be installed, the existing countertop (if any) needs to be removed, and the area must be prepared. Removing an old countertop is a labor-intensive process that involves disconnecting plumbing fixtures, carefully detaching the old surface, and ensuring that the underlying cabinets remain undamaged. The removal process must be done with care to avoid damaging the cabinets, as any damage could complicate the installation of the new countertop.
If your current countertops are being replaced, the removal process can take 1 to 2 days, depending on the complexity and condition of the existing installation. After removal, the installation team will inspect the cabinets to ensure they’re level and secure, as these are crucial factors in ensuring that the new countertop fits properly. Any necessary adjustments or reinforcements will also be made at this stage, which may add another day to the preparation time. It’s important that the cabinets are level and sturdy, as an uneven base can lead to issues with the countertop, such as cracks or improper fitting.
Additionally, if any plumbing or electrical work needs to be completed, this is the time to do it. For example, if you are installing new fixtures or appliances that require electrical outlets or plumbing adjustments, these changes must be made before the countertop is installed. Proper preparation will help ensure a smooth installation process and prevent delays.
6. Countertop Installation Day (4-6 Hours)
The day of installation is perhaps the most exciting part of the process. The countertop slabs are carefully transported to your home and set in place. The installation process usually takes between 4 to 6 hours, depending on the size and layout of your countertop, as well as the number of cutouts required for sinks, faucets, and appliances. Larger countertops or those with multiple pieces may take longer to install, especially if there are seams that need to be joined.
Installers will ensure that the countertop is level and secure, making any necessary adjustments to fit the contours of your walls and cabinets. Once the countertop is in place, they will seal the seams and edges to create a seamless look. The seams are filled with epoxy that matches the color of the countertop, making them as inconspicuous as possible. At this point, the installers may also apply adhesive or caulk to secure the countertop and prevent moisture from seeping underneath. It’s important that the countertop is properly secured to avoid any shifting or movement over time.
If you have a multi-piece countertop, the installers will carefully align the seams and use clamps to hold the pieces together while the adhesive sets. This ensures that the seams are tight and nearly invisible. The installation team will also check for any gaps between the countertop and the wall, filling them with caulk to create a finished look and prevent water damage.
7. Final Touches and Cleanup (1 Day)
Once the countertop is installed, there are some final touches that need to be completed. This includes installing fixtures such as sinks and cooktops, adding any backsplashes, and sealing the surface to protect against stains and damage. If you opted for a backsplash, it will be installed at this time, which may take an additional few hours depending on the complexity and materials used.
The installation crew will also clean up the work area, removing any debris and ensuring that your kitchen or bathroom is left in good condition. Depending on the complexity of your project, the final touches and cleanup typically take about 1 day. It’s important that the area is cleaned thoroughly, as dust and debris from the installation can affect the appearance of the new countertop. The installers will also test any installed fixtures, such as sinks and cooktops, to ensure they are functioning properly.
8. Curing and Settling Time (24-48 Hours)
After installation, it’s important to allow the adhesives and sealants to fully cure. This settling period usually lasts 24 to 48 hours. During this time, it’s best to avoid placing heavy items on the countertop or using the sink, as the adhesives need time to bond securely. Avoiding excess weight or moisture during this period will help ensure that the countertop is properly set and that the adhesive bonds are strong.
This curing time is crucial for ensuring the longevity of your new countertop. Following the installer’s recommendations for care during this period will help prevent any issues, such as loosening or shifting of the material. In addition to avoiding heavy items, it’s also advisable to keep the area clean and free of any spills during this time. Once the curing period is complete, you can begin using your countertop as normal, but it’s still important to follow any care guidelines provided by the installer to keep it looking its best.
9. Project Completion and Final Review (1 Day)
After the curing period, the final step involves a walkthrough with your installer to ensure that everything has been completed to your satisfaction. During this review, the installer will check for any issues, such as uneven seams or improperly installed fixtures, and address any concerns you may have. They will also ensure that all edges are properly sealed and that the countertop is securely in place.
You’ll also receive care and maintenance instructions for your new countertop, which will help you keep it looking great for years to come. These instructions may include information on cleaning products to use or avoid, how to prevent damage from heat or heavy impacts, and how often to reseal the surface (if applicable). This final review usually takes about 1 day and is a great opportunity to ask any questions you might have about maintaining your new countertop. It’s also a chance to make sure that you are completely satisfied with the work before the project is officially completed.
Conclusion
Installing a new countertop is a multi-step process that involves careful planning, precision, and skilled craftsmanship. By understanding the timeline and what to expect at each stage, you can prepare yourself for a smooth and successful installation. From the initial consultation to the final walkthrough, each phase is designed to ensure that your new countertop not only looks beautiful but also stands the test of time.
Taking the time to understand each step of the process will help you make informed decisions, set realistic expectations, and ultimately enjoy the transformation of your kitchen or bathroom. Whether you’re upgrading your space for practical reasons or to enhance your home’s aesthetic appeal, a well-installed countertop can make all the difference. The right countertop can become a focal point in your home, providing a functional workspace and adding a touch of luxury that you can enjoy every day. With proper care and maintenance, your new countertop will continue to look beautiful and serve your needs for many years to come.


