
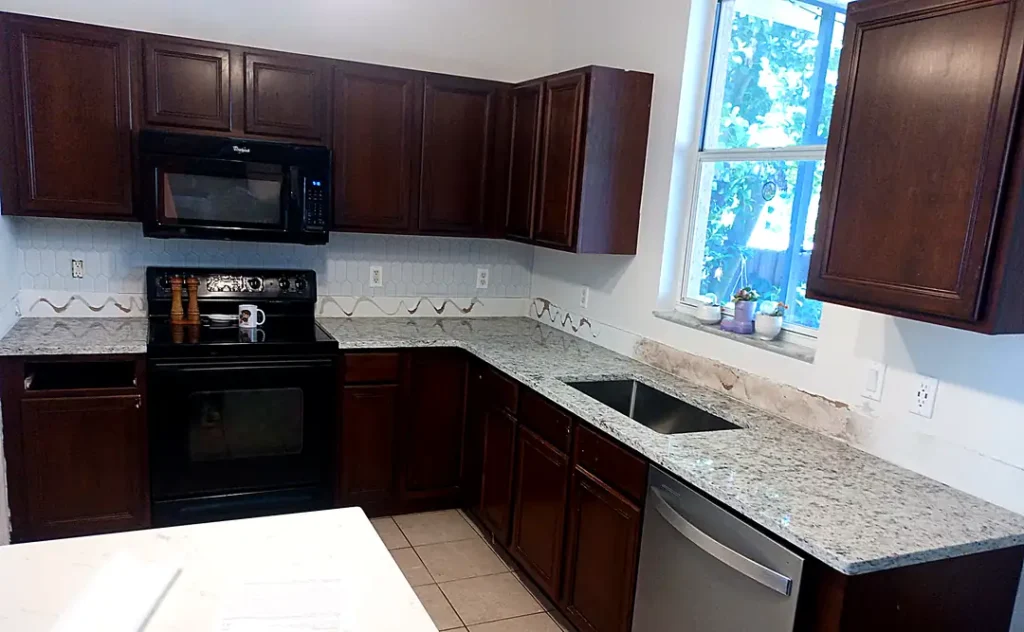
It usually starts as a thin dark line. You’re wiping the counter one evening and notice a shadow where the stone meets the sink, maybe two inches long. A week later it’s four, the disposal hangs lower than it used to, and one morning you open the cabinet and the bowl is resting on the P-trap. That’s an undermount sink pulling away from the countertop, and it has a mechanical explanation.
We get these calls every week, and the homeowner is almost always asking the wrong question. They want to know what went wrong with the glue. The real question is what was holding the sink up in the first place, because in most of these failures the honest answer is: not much. Below is the mechanics, the real weights, the failure patterns we see in Central Florida, and what a repair costs.
Why an Undermount Sink Pulls Away From the Countertop: One Sentence
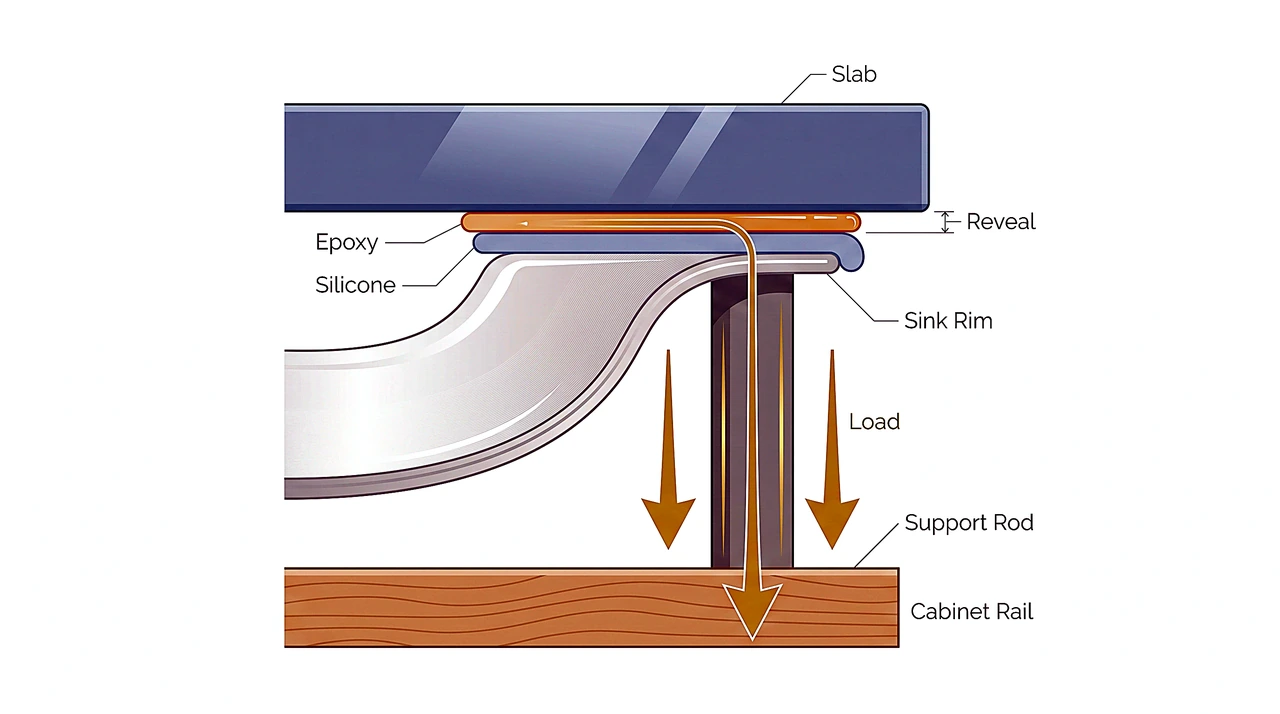
Here it is: the epoxy bonds the sink, it does not carry the sink.
An undermount sink is held up by mechanical support underneath it: rails, rods, straps, or clips that transfer the load into the cabinet box. The adhesive at the rim keeps the sink registered tight to the stone so the joint stays flat and watertight. Two different jobs. Make one product do both and gravity eventually wins.
Silicone is a gasket, not an adhesive
Silicone’s job is waterproofing. It stays flexible on purpose so it can absorb a house’s small movements without tearing, and flexible is the opposite of load-bearing. Kohler’s installation guide for its apron-front cast iron sinks (document 1218029-2-D) lays out the sequence: build a support frame in the cabinet (step 2), lower the sink onto it and verify the sink is supported by the frame (step 3), and only then, in step 4, does silicone appear at all. By the time any sealant is applied, the frame is already carrying the sink. That’s this article’s thesis, printed by the manufacturer.
Two-part epoxy is the bond, not the structure
Epoxy is genuinely structural, and it’s what we use to set clips against the underside of the slab. But at a sink rim it’s loaded in peel and shear across a thin joint on a porous surface, close to the worst way to load an adhesive. It works as one part of a stack. Asked to be the whole stack, it holds a year, then two, then one Tuesday it doesn’t.
The Support Stack: What’s Actually Under There
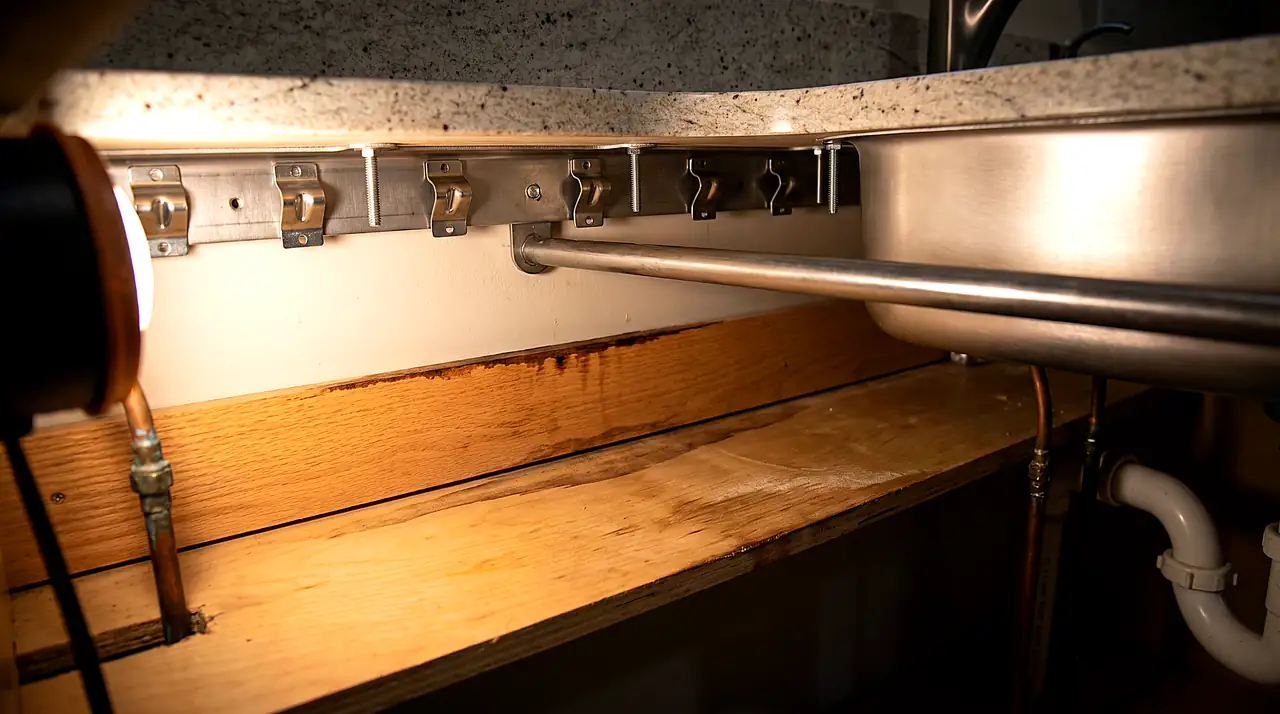
Cabinet-mounted rails and decks
The strongest method, and what we build for anything heavy. Horizontal rails run along the inside walls of the sink base, sometimes with vertical legs to the cabinet floor, and the rim sits on them. The load path is short and honest: sink to rail to cabinet box to floor. Kohler’s guide puts a number on it: use proper fasteners and techniques to ensure the frame will support a minimum of 300 lbs (136 kg). That’s the manufacturer saying in writing that the cabinet carries this, not the epoxy.
Support rods and straps
The middle tier. Steel straps or rods span the cabinet opening and cradle the sink from below, mounting to the cabinet sides rather than your stone. The Sinkits sink strap publishes 400 lb per strap, 800 lbs with two, with no adhesive and no drilling into the slab. It’s what we usually use on a retrofit where the countertop stays put.
Clips, and where they don’t belong
Clips are studs epoxied to the underside of the slab with a bracket and wingnut that pulls the rim up snug. Set every 6 to 8 inches and tightened in a cross pattern, they’re fine for a stainless or composite bowl. They don’t belong under a hundred-plus pounds of cast iron with nothing else beneath. Clips hang the sink from the stone. Rails stand the sink on the cabinet.
Sink Weight vs. Support: The Numbers We Design To
Homeowners underestimate this, because they weigh the sink in their head and stop there.
| Sink type | Typical dry weight | What it needs |
|---|---|---|
| Stainless, 16-gauge, 30″ single bowl | roughly 25 to 35 lb | Properly set clips are adequate |
| Granite composite, 30″ single bowl | roughly 35 to 50 lb | Clips plus a strap or rail |
| Enameled cast iron, 33″ double bowl | roughly 70 to 90 lb | Cabinet-mounted rails, not clips alone |
| Fireclay farmhouse, 30″ (Rohl Lancaster RC3018WH-C) | roughly 145 to 160 lb | Purpose-built cabinet deck |
| Cast iron farmhouse, 36″ (Kohler Whitehaven) | roughly 150 lb | Cabinet deck, frame rated 300 lb |
The load nobody counts
Now fill it. A 30-inch bowl with a 28 by 16 inch basin at 9.5 inches deep holds about 18 gallons, and water weighs 8.34 pounds per gallon. That’s roughly 154 pounds of water in a bowl you thought weighed 30. Add a 1 HP disposal at 19 to 26 pounds on the drain, plus a Dutch oven soaking overnight. Your 30-pound stainless sink is a 200-pound-plus assembly on a bad night, which is why Kohler wants 300 lb of frame. Same problem as an unsupported island overhang, covered in our guide to how far you can cantilever before you need brackets.
The Warning Signs, in the Order They Show Up
- A hairline dark line at the reveal. The first symptom, and the one everybody ignores. That shadow is the silicone gasket stretching as the sink drops a millimeter or two. Movement means something below already let go.
- The disposal hangs lower, or the dishwasher drain hose went from taut to slack. The sink has descended. Nothing else explains it.
- A cabinet floor that feels soft or smells musty. The Florida special, and usually the cause rather than the symptom.
Caught at the dark-line stage, this is an hour of work. Caught later, you’re also buying a cabinet floor, a disposal, and a plumber.
The Cutout: Radius and Reveal
A sharp inside corner in stone is a stress riser, and it’s where cracks start, which is why every inside corner of a sink cutout gets drilled and routed to a radius. The practical minimum is 1/4 inch, and we go to 3/8 or 1/2 inch on thinner or more brittle material. We also want at least 1.5 inches of stone left on all sides of the opening. Skipping the radius is a common cause of a cracked cutout, worth knowing if someone tells you your dropped sink cracked your top. Usually it’s the other way around, and our post on what causes quartz countertops to crack has the rest.
Reveal is the relationship between the cut edge and the bowl wall. Positive reveal overhangs the stone into the opening by about 1/8 inch, hiding the epoxy joint, so it’s the most common. Zero reveal lines up exactly with the bowl wall. Negative reveal laps the stone over the bowl by 3/16 to 3/8 inch and needs the underside polished. Thickness shapes what’s practical, covered in our 2cm vs 3cm comparison. Reveal is also diagnostic: even at install and uneven now means the sink moved.
Why They Fail: Three Signatures We See in Central Florida
1. It was never really attached
The silicone-only install. We find these in flips, rental turnovers, and jobs where a cabinet crew set the sink because the stone people had already left. Somebody ran a fat bead of clear silicone around the rim, propped the sink overnight, and pulled the prop in the morning. It was never attached. It was parked. It fails in year one to year three, and the silicone comes away in one rubbery ribbon.
2. Epoxy bonded to a dusty or damp edge
Epoxy needs a clean, dry, oil-free surface. Cut stone off a wet saw is neither. Proper prep means wiping both surfaces with isopropyl alcohol and letting them dry fully, and we leave the joint dry and unstressed overnight before it goes back into service. On a rushed install that prep gets skipped and the epoxy bonds to slurry dust instead of stone. Dead before the truck left the driveway.
3. The most humid cubic foot in your Florida house
Our region’s specialty, and the one that takes down installs done correctly. Outdoor humidity in Central Florida averages around 74% year-round and routinely sits near 90% at dawn, and a sink base cabinet is closed, unconditioned, unventilated, and full of cold supply lines that sweat. Even in a well-conditioned house holding 45 to 55% in the living space, the air inside that cabinet runs far wetter than the room it sits in. Add a faucet base leaking a teaspoon a day and that plywood deck absorbs water and never dries. It doesn’t rot dramatically. It softens, and the screws lose their bite. The rail is still there, the geometry still looks right, and the material around the threads has quietly turned to oatmeal. Snowbird homes are the worst case: closed for months with a drip running and nobody home.
The Repair: What It Takes and What It Costs
Your countertop almost never needs replacing
The stone is fine. It’s an inert slab with a hole in it, and it did not fail. If a company answers your fallen sink with a full countertop replacement quote, get a second opinion. That’s not us being competitive, that’s the truth about our own industry. The only time the top genuinely comes off is when the cutout is cracked through. Related: replacing countertops without replacing the cabinets.
What the job involves
- Disconnect the plumbing, support the sink from below, drop it, and scrape old silicone and epoxy off the stone and the rim.
- Diagnose the substrate. The step the cheap guy skips. New fasteners into soft wood buy you eighteen months. Rot has to come out and the deck rebuilt in solid material.
- Build mechanical support sized to the sink, add fresh clips and epoxy, then reset, shim level, re-gasket, and leave it dry and unstressed overnight.
A straightforward reattach on sound substrate is typically a few hundred dollars and a couple of hours on site. Rebuilding a rotted deck climbs from there. Anyone quoting over the phone without seeing the underside is guessing.
What to do tonight
Stop using it, and don’t run the dishwasher, which drains into that assembly. Empty the cabinet and shut the supply valves if you see water. Then prop it: scrap lumber cut snug from the cabinet floor to the underside of the sink, with a towel to protect the finish. Snug, not jacked. You’re catching it, not lifting it.
Frequently Asked Questions
Why did my undermount sink pull away from the countertop?
Because the mechanical support underneath failed, or was never there. Three causes cover nearly everything: a silicone-only install that was never structurally attached, epoxy bonded to a dusty or damp cut edge, or fasteners that lost their bite in a sink-base deck softened by a slow leak. The stone is essentially never the cause.
How much weight can an undermount sink actually hold?
The sink isn’t the limit, the support is. Kohler’s guide for cast iron under-mount sinks specifies a frame rated to a minimum of 300 lbs, and commercial strap kits publish around 400 lbs per strap. Properly set clips are fine for a 30 lb stainless bowl. Filled to the brim, a 30-inch bowl holds roughly 154 lbs of water.
What does it cost to reattach a dropped undermount sink?
In Central Florida, a straightforward reattach on sound substrate is typically a few hundred dollars and a couple of hours on site. It climbs if the cabinet deck has rotted, if the sink needs a purpose-built support structure, or if the plumbing needs work. Nobody can quote it without seeing the underside.
Can I put a heavy fireclay farmhouse sink under quartz?
Yes, but an apron-front farmhouse sink isn’t hung from your stone at all. It sits on a support deck built into the cabinet, and the countertop goes over it afterward. A 30-inch Rohl Lancaster fireclay sink runs roughly 145 to 160 lb dry depending on the listing. That load belongs to the cabinet, so budget for the cabinet work.
Can I just add more silicone around the sink?
No. Silicone is a flexible waterproof gasket, and flexibility is the opposite of load-bearing. Adding silicone to a sagging sink hides the dark line for a few weeks and changes nothing structurally, while the real failure keeps progressing behind it. Fix the support, then re-gasket.
Send Us a Photo of the Underside
If you’ve got a dark line at your reveal, or a sink that’s already let go, open the cabinet, point a flashlight up, and take a picture. We can usually tell from that one photo whether you’re looking at an hour of work or a rebuilt cabinet deck. We’ve been templating, fabricating, and installing countertops in Orlando since 2006, all in-house.
Call us at (407) 973-2074 or stop by the showroom at 6650 Hoffner Ave. Estimates are free, and if the answer is “your sink is fine, call a plumber,” that’s what we’ll tell you. If a replacement is on the table, our sink options and our guide to choosing between undermount, drop-in, and farmhouse are worth a look.
Planning a countertop project in Central Florida?
- Estimate your price with our free countertop calculator
- Browse our quartz countertops
- Browse our granite countertops
- Get a free in-home estimate